Key takeaways:
- Fixing a leak in an air mattress is important to ensure its functionality and comfort. It’s necessary to know how to air out a memory foam mattress.
- Confirming and locating the tear in an air mattress involves amateur sleuthing, listening for a hissing sound, and deflating the mattress to find and confirm the hole.
- Various patching options are available including temporary fixes, third-party air mattress patch kits, and DIY options.
- Sealing the leak and testing the fix requires cleaning and marking the leaky area, patching the hole, using professional-grade gaffer tape for sealing, and testing the fixed mattress for any remaining leaks.
- Additional information on air mattresses includes different types available, maintenance tips, and the pros and cons of using Intex air mattresses.
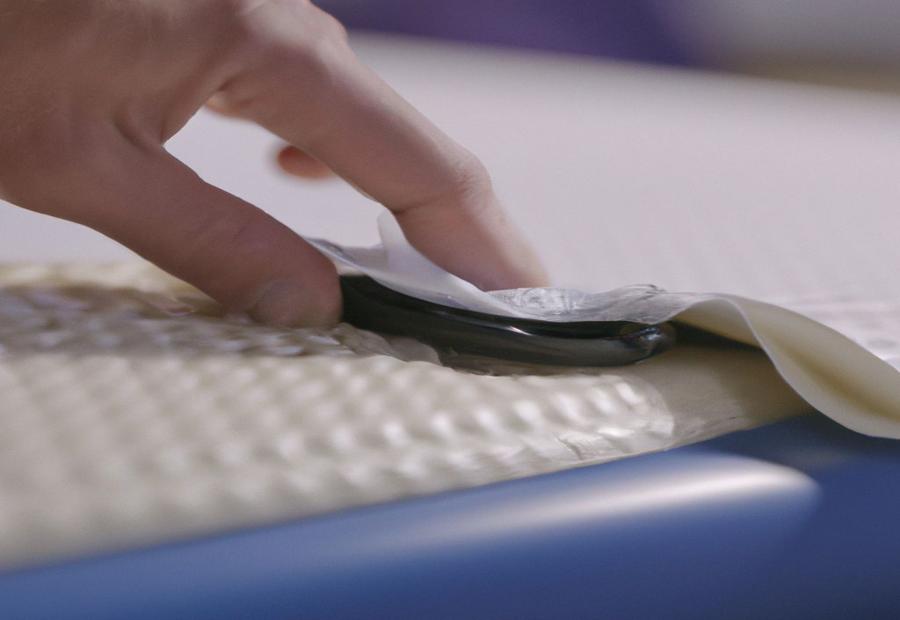
Photo Credits: Www.Mattressreviewguru.Com by Lawrence Walker
Fixing a leak in an air mattress is crucial to ensuring a comfortable and uninterrupted night’s sleep. In this section, we will uncover why it is important to address any leaks in your air mattress promptly. By understanding the significance of fixing these leaks, you can avoid sleep disturbances, maintain proper support, and extend the lifespan of your air mattress. So let’s dive in and discover the reasons why tackling air mattress leaks should be a top priority.
Importance of fixing a leak in an air mattress
Leaks in air mattresses can affect their usefulness and comfort. It is essential to fix them to ensure good sleep, no discomfort, and a longer life for the mattress. If leaks are not fixed, the mattress may gradually deflate, leading to an uncomfortable sleeping surface, sore backs, and interrupted sleep. Ignoring or delaying repair will worsen the problem, making it harder to fix and possibly expensive to replace.
Air mattresses have different types and causes of leaks, needing different methods to locate and fix them. It is important to find and confirm the leak before repairs. You can do this by listening for a hissing sound or looking for holes. Deflating the mattress is necessary to confirm the leak.
Once the leak has been confirmed, there are various patching options available. For quick fixes, you can use adhesives or tapes. For more reliable and long-lasting results, you can use third-party air mattress patch kits or make your own DIY patch using rubber glue or bike tire patches after cleaning the area.
To make sure the repair works, clean and mark the leaking area. Then, you can patch it with adhesives or gaffer tape. Finally, inflate and deflate the mattress to test the fixed area and check for any further leaks.
Confirmation and location of the leak
Photo Credits: Www.Mattressreviewguru.Com by Logan Campbell
Confirming and locating a leak in your air mattress is crucial for timely repairs. In this section, we’ll explore some effective techniques to identify the source of the leak. From amateur sleuthing to utilizing the hissing sound as a clue, we’ll uncover ways to pinpoint the problem. By deflating the air mattress and actively searching for the hole, we can confirm the leak and take necessary steps to fix it. Remember, a little investigation goes a long way in ensuring a good night’s sleep!
Amateur sleuthing
Amateur sleuthing is key for locating and plugging air mattress leaks. It has a few steps:
- Listen to the hissing sound
- Deflate the mattress
- Inspect it
- Check for leaks with pressure or bubbles
It’s also important to note the resourcefulness of amateur sleuthing. It can find leaks that traditional methods can’t. Amateur sleuthing is vital for successfully repairing air mattress leaks. It should not be underestimated!
Hissing sound
If you suspect a leak in an air mattress, here are the steps to find and solve it:
- Deflate the mattress and look for signs of a puncture.
- Use your hand to feel for coolness or a breeze in any spot.
- To confirm, apply some soapy water and watch for bubbles.
With these steps, a leak in an air mattress can be found and solved.
Deflate the air mattress
To deflate an air mattress, follow these steps:
- Find the valve, which is usually located on the side of the mattress.
- Twist or pull, depending on the type of valve, in order to open it.
- Press down on the mattress to release any remaining air.
It is essential to deflate the mattress before starting any repairs. To protect the floor or ground, place a towel or tarp underneath to catch any water or debris.
Now you’re ready to fix the leak!
Fun fact: air mattresses were first used for hospital patients. (Source: www.sleepadvisor.org)
Find the hole
Find the hole in an air mattress: crucial! Amateur sleuthing and listening for a hissing sound are good techniques. Deflate the mattress. Check every inch of its surface. Look for tears, punctures and holes. Take your time to spot small leaks. Soapy water and other methods help. Inflate it slightly and feel for changes in airflow. It’s important to find the exact spot that needs repair.
Confirm the leak
Confirming a leak in an air mattress is essential for repair. Spotting the exact location of the leak is key. This ensures a successful fix.
Sleuthing is one way to spot the leak. Inspect the mattress and look for visible signs of damage or puncture. Hissing sounds can also be an indicator of air escape.
Deflating the air mattress might help better pinpoint the location of the leak. This makes small holes or cracks easier to find. Carefully inspect the entire surface after deflating.
To confirm the existence of the leak, apply pressure around the suspected area. Listen for hissing sounds or feel for escaping air with your hand. If confirmed, select an appropriate patching option to repair the leak.
Patching options
Photo Credits: Www.Mattressreviewguru.Com by Ryan Ramirez
Patching options play a crucial role in fixing leaks in an air mattress. In this section, we will explore various options that can help you address this issue. From temporary fixes to third-party air mattress patch kits and DIY alternatives, we’ll uncover the resources available to restore your mattress’s functionality. So, whether you’re looking for a quick solution or prefer a more long-term approach, there are options to suit every preference and budget.
Temporary fix
Dealing with a leak in an air mattress? Do it quickly to prevent more damage. An adhesive patch from a repair kit is a great temporary fix. If you don’t have the patch, you can use duct tape or silicone sealant. If you’re a DIYer, try super glue or rubber cement and a patch of nylon or vinyl. But know that these might take extra effort. Need more help? Read the sections above for more info on leaks, testing the fix, and air mattress maintenance. Remember: Temporary fixes are only short-term. Monitor the area regularly and plan for a proper repair or replacement.”
Third-party air mattress patch kit
A third-party air mattress patch kit is a great fix for leaks! It’s designed specifically for that purpose and is easy to use. The patch kit comes with adhesive patches. They’re made from durable material that can handle air mattress pressure and movement. Some kits even include glue, sandpaper and cleaning solutions. These kits are widely available online or in stores.
But, third-party air mattress patch kits may not be a permanent solution. If the damage is extensive, you may need to replace the mattress or seek professional repair services.
Pro Tip: When using a third-party air mattress patch kit, carefully follow the instructions provided to get the best results.
DIY options
Incorporating DIY options, we suggest the following:
- Identify the leak: Deflate the air mattress. Look for damage or a hissing sound.
- Patching options: Use adhesive patches, household items, duct tape, super glue, fabric patches, or third-party air mattress patch kits.
- Sealing the leak and testing the fix: Clean the area around the leak. Follow instructions when patching up the hole. Seal with gaffer tape. Test by inflating and deflating the air mattress.
Note: DIY options may not guarantee a permanent solution. Appropriate materials and repair techniques are essential for success. Seal the leak and test the fix for security and uncertainty.
Sealing the leak and testing the fix
Photo Credits: Www.Mattressreviewguru.Com by Aaron Adams
Sealing the leak and testing the fix: Discover simple yet effective methods to address and verify leaks in your air mattress. Learn how to identify and mark the leaky area, patch it up using reliable techniques, seal it securely with professional-grade gaffer tape, and carry out thorough testing to ensure a successful repair.
Clean & mark the leaky area
Cleaning & marking the leaky area of an air mattress is key when fixing the issue. This helps with patching & sealing to prevent further damage & secure long-term results.
To clean & mark the leaky area:
- Deflate the air mattress & spot the leak.
- Clean the surface around the leak with a mild detergent or soapy water.
- Wash off any left over cleaning solution & dry the area with a towel.
- Look for any bubbles or hissing sounds to confirm the leak.
- Mark the exact location of the leak with a marker or tape.
- Make sure the marked area is dry before patching & sealing.
Note any unique details relating to the leaky area. This includes underlying causes of leakage, like punctures or wear and tear near seams. Taking note of these will help with air mattress repair techniques & prevent future issues.
Camping one night, I noticed a small leak in my air mattress. After deflating it, I cleaned & marked the area with soapy water & a marker. The markings made it easy to locate & patch the hole with a DIY repair kit. Pleased, my air mattress held up perfectly during my trip.
Patch the leak
Patch up the leak in your air mattress! Here’s how:
- Clean and mark the area.
- Then, patch it with duct tape, adhesive patches, or a third-party patch kit.
- For a more permanent solution, use professional-grade gaffer tape to seal it.
- Once done, inflate the mattress and check if the patch is successful – no air leakage means your repair was a success!
Patching up your air mattress with gaffer tape is the way to go for a long-lasting fix.
Sealing with professional-grade gaffer tape
- Clean and mark the leaky area. Start by cleaning the surface around the leak. Then, mark the exact spot of the leak to identify it easily.
- Cut a piece of professional-grade gaffer tape larger than the size of the leak. Put it over the marked area and press firmly on all the edges.
- Inflate the air mattress and see if air escapes from the patched spot. Squeeze the taped area to check for any changes in firmness or air loss.
- Using professional-grade gaffer tape for sealing provides a reliable and long-lasting fix for your air mattress. It ensures strong adhesion and keeps the pressure optimal inside for a comfy sleep.
- Repositioning is easy with this type of tape, and you get a waterproof seal that prevents more leakage. You can do this patching at home without any expensive kits or pro help.
- Someone who tried this method found it gave a durable fix that lasted months without any more leaks. Their story shows how efficient and cost-effective this method is for repairing air mattress leaks.
Testing the fix
Testing the fix is key! Here are 4 ways to check if a patch is secure and reliable:
- Inflation Test: Inflate the mattress and leave it for a while. If no deflation occurs, the fix is good!
- Pressure Test: Apply pressure around the patched area. If no air escapes, the fix is secure.
- Water Test: Spray the patched area with soapy water and look for bubbles. If bubbles form, more repair is needed.
- Repeated Use Test: Inflate and deflate multiple times. If no leaks appear, it’s effective and durable.
Remember to follow manufacturer guidelines or get professional advice. Also, keep in mind that factors such as temperature or humidity may affect the patch over time. Regular checks are important for long-term effectiveness. Now you know how to be an air mattress guru!
Additional information on air mattresses and related content
Photo Credits: Www.Mattressreviewguru.Com by Jerry Baker
When it comes to air mattresses, there’s more to know than just how to fix a leak. In this section, we’ll dive into additional information about air mattresses, covering topics such as the different types available, maintenance tips to keep your mattress in top shape, and the pros and cons of using air mattresses. So, if you’re looking to expand your knowledge and make informed decisions about air mattresses, you’re in the right place. Let’s explore the world of air mattresses beyond just fixing leaks.
Types of air mattresses
Air mattresses come in various types, each with their own unique features and benefits. Knowing the different types can help you pick the one that suits you best.
Standard air mattresses are the most common. They are inflatable, made of PVC or vinyl, and offer adjustable firmness. Great for indoor and outdoor use.
Folding air mattresses are great for camping trips or temporary sleeping arrangements. They can be folded and are lightweight.
Raised air mattresses are taller, like a traditional bed. This is to make getting in and out easier, and offer more comfort.
Self-inflating air mattresses have built-in pumps that inflate and deflate at the push of a button. No need for manual inflation!
How to Keep Air Mattress From Sliding provide pressure relief and come with alternating pressure systems or adjustable firmness levels.
Camping air mattresses are durable and lightweight and often include features like pillows and insulation.
There may also be specialized air mattresses for backpacking or water activities.
When choosing an air mattress, consider use, durability, comfort, and portability. Explore options before making a purchase. Knowing the types and their features will help you find the perfect mattress for you.
Maintenance tips for air mattresses
Maintenance Tips for Air Mattresses:
To keep air mattresses in optimal condition, follow some simple tips:
- Inspect them regularly for punctures, tears, or leaks.
- Clean the surface with a mild soap and water solution, not harsh chemicals.
- Dry the mattress before storage to avoid mold or mildew.
- Store in a cool, dry place away from direct sunlight and extreme temperatures.
- Avoid jumping or placing heavy objects on the mattress.
- Use a protective cover or sheet to prevent stains.
- How to Fix a Leak in Air Mattress
By doing these maintenance measures, you’ll be sure to enjoy a comfortable sleeping experience.
Inspect, clean, dry, store in a cool place, avoid pressure, and use a protective cover.
Pros and cons of using air mattresses
Air mattresses have both benefits and drawbacks that should be thought about before deciding if they should be used. Advantages include:
- Comfort: Adjustable firmness to customize the sleeping experience.
- Portability: Lightweight, easy to deflate and pack.
- Affordability: Generally cheaper than traditional mattresses.
Disadvantages include:
- Durability: Prone to leaks and punctures.
- Maintenance: Necessary to avoid leaks, keep inflated and tidy.
- Sleeping experience: Some might find lack of support uncomfortable.
It is important to remember that suitability depends on personal preferences and usage. Therefore, one should carefully consider both pros and cons before making a decision about air mattresses.
Conclusion
Photo Credits: Www.Mattressreviewguru.Com by Bryan King
- A small or big leak in your air mattress needs to be fixed quickly for comfortable sleep.
Step 1 is to find the leak. Inflate the mattress and look for any holes or punctures. After that, patch it with a patch kit or adhesive tape. Read the instructions given with the kit or tape for effective repair.
- Test the mattress to make sure the repair worked. Inflate it and check if air is leaking. If it is, repeat the repair or replace the mattress.
-
To avoid future leaks, use a mattress protector or cover and keep sharp objects away from the mattress. Doing this will help prevent damage and extend the mattress’s lifespan.
- Fixing a leak in an air mattress is simple with some help. Find the source, repair it properly, and test it. Preventive measures can help protect your mattress and make it last longer.
Some Facts About How to Fix a Leak in Air Mattress:
- ✅ A leak in an air mattress can be fixed quickly and permanently. (Source: Team Research)
- ✅ Confirm if there is a leak by refilling the mattress and checking if it loses air again. (Source: Team Research)
- ✅ To locate the leak, listen for the sound of escaping air or use soapy water to find bubbles. (Source: Team Research)
- ✅ Patch the leak using options like duct tape, a patch kit, thin plastic, or a hot glue gun. (Source: Team Research)
- ✅ Inflate the mattress after sealing the leak to test the fix. (Source: Team Research)
FAQs about How To Fix A Leak In Air Mattress
How do I seal a leak in my air mattress if I don’t have a patch?
If you don’t have a patch kit, there are a few temporary solutions you can try. You can use super glue to fix leaks on the seams by pinching or folding the seam and applying the glue. Another option is to use a piece of thin plastic material, like a shower curtain liner or pool liner, as a DIY patch. Cut a piece larger than the leaky area and use super glue or rubber cement to attach it to the mattress. In a pinch, duct tape can also be used. Cut a piece to fit over the hole or leaky spot, place it on the mattress, and apply pressure with something heavy for a few minutes to ensure it adheres.
What should I do if I have a pin-prick sized hole in my air mattress?
If you have a pin-prick sized hole in your air mattress, you can still patch it up. You can use a small amount of super glue or even fill the hole with super glue to seal it closed. Just be sure to wipe off any excess glue and allow it to dry completely before inflating the mattress.
Should I buy a new mattress if my air mattress keeps losing air?
No, you don’t necessarily need to buy a new mattress if your air mattress keeps losing air. Most leaks can be easily fixed with patches or other temporary solutions. By locating the leak and properly sealing it, you can extend the life of your air mattress and save money in the long run.
Do I need a third-party air mattress patch kit?
While most air mattresses come with their own patch kits, you can also purchase third-party patch kits for added convenience. These kits often come with adhesive patches and other tools to easily fix leaks in your air mattress. If your air mattress does not come with a patch kit or you prefer the convenience of a third-party kit, it can be a good option to have on hand.
How do I locate the source of the leak in my air mattress?
To locate the source of the leak in your air mattress, you can use a few methods. One method is to fully inflate the mattress and listen for the sound of air escaping. You can also run your hand over the surface of the mattress to feel for any air escaping. Another method is to create a mixture of dish soap and water, spray it onto the mattress, and look for bubbles forming over the area with the leak.
Is it possible to fix a leak in an air mattress without using a patch?
Yes, it is possible to fix a leak in an air mattress without using a patch. In some cases, you can use alternative methods like duct tape, super glue, or even a hot glue gun to seal the leak. However, it’s important to note that these methods may be temporary solutions and may not provide a long-lasting fix. It is recommended to use a proper patch kit or repair materials for a more reliable and durable solution.

