Key Takeaways:
- The importance of promptly fixing a popped air mattress cannot be overstated as it ensures a comfortable sleep experience and prevents further damage.
- Common causes of air mattress leaks should be identified, such as sharp objects, wear and tear, and manufacturing defects, in order to prevent future leaks.
- When identifying the leak, it is important to fully inflate the mattress and carefully observe and test for deflation, before marking and cleaning the area around the leak for effective repair.
- Patching techniques include using a patch kit, which involves following step-by-step instructions to achieve a successful repair. Alternative methods such as using super glue, a shower curtain liner, an old t-shirt, or duct tape can also provide temporary fixes.
- To ensure a successful repair, proper pressure should be applied on the patch, allowing sufficient time for the adhesive to set, and testing the repaired mattress for leaks afterwards.
- Precautions and maintenance tips, such as avoiding sharp objects and properly storing the mattress, can help prevent air mattress leaks. Regular maintenance, such as cleaning and checking for small leaks, can prolong the lifespan of the mattress.
- In conclusion, promptly addressing a popped air mattress through proper identification, patching techniques, and maintenance is crucial to ensure comfort and prolong the lifespan of the mattress.
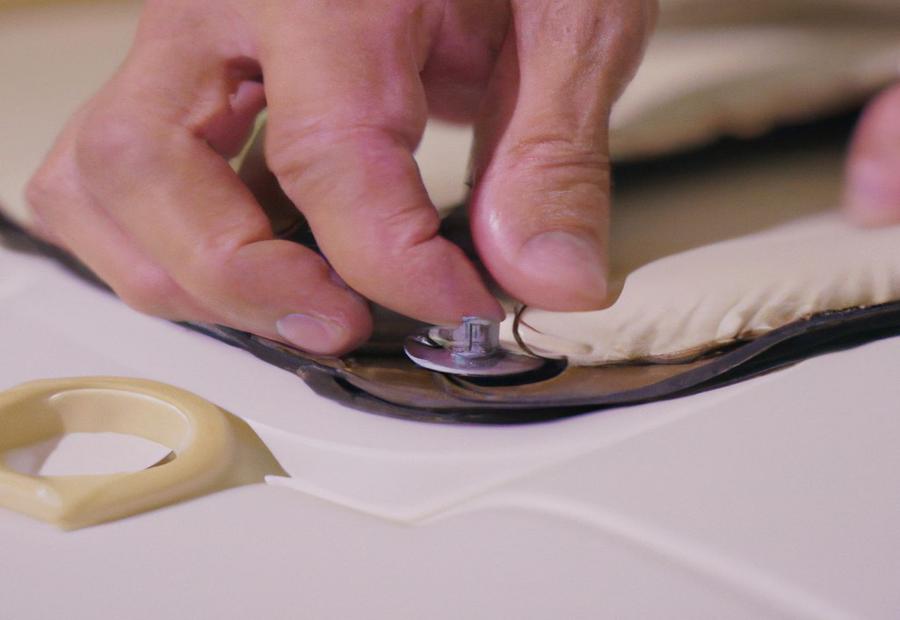
Photo Credits: Www.Mattressreviewguru.Com by Samuel Williams
When your air mattress pops, it can turn a good night’s sleep into a deflated nightmare. In this section, we’ll explore why fixing a popped air mattress is crucial and delve into the common causes of air mattress leaks. By understanding the significance of addressing this issue and identifying the potential culprits behind the leaks, you’ll be equipped with the knowledge to restore your air mattress to its fully functional and comfortable state.
The importance of fixing a popped air mattress
A popped air mattress can be a major inconvenience. Ignoring it can cause discomfort and further damage. It’s important to understand the need to fix it.
Steps:
- Inflate the mattress and check for deflation. Is there a significant loss of air? That could indicate a leak.
- Carefully inspect the mattress. Feel for any hissing sounds, or use soapy water or submerge it in water. Look for bubbles that form at the source of the leakage.
- Mark the leak and clean the area with mild detergent or alcohol.
- Use a patch kit designed for air mattresses. Apply even pressure while sealing all edges. Allow enough time for adhesive curing before re-inflating.
- Don’t delay repairs. You can fix the popped air mattress and enjoy better sleep quality.
Common causes of air mattress leaks
Air mattress leaks can be caused by various factors. These include:
- Improper inflation: When the mattress is not correctly inflated, it can put too much pressure on specific spots and cause a leak.
- Sharp objects: Objects such as nails, pins, or even a pet’s claws can puncture the mattress.
- Wear and tear: Regular use can damage the material, making it prone to leaks.
- Temperature changes: Excessive weight and bad storage conditions can also contribute to air mattress leaks.
It is important to take preventive measures and address the issue quickly. A small leak can become a big problem if left untreated. Proper maintenance can extend the lifespan of the air mattress and provide a comfortable surface for sleeping. Don’t miss out on quality rest – take action now!
Identifying the Leak
Photo Credits: Www.Mattressreviewguru.Com by Gary Martin
Identifying the leak in your popped air mattress is crucial for effective repair. We will explore different techniques to locate the leak, including observing signs of deflation, conducting tests to pinpoint the exact area, and preparing the surface for repair. These steps will help you quickly identify the source of the leak and take the necessary measures to fix your air mattress.
Inflating the mattress and checking for deflation
- Inflate your mattress with a pump or manually. Make sure it’s full – this’ll make it easier to spot deflation.
- Look for any changes in shape.
- Press different areas and listen for hissing – this could mean a leak.
- To double-check, do a bubble test. Put soapy water on the mattress and check for bubbles – these mean air is escaping.
- Mark the spot with a permanent marker or tape.
- Then you can patch the leak!
Spotting deflation is easy if you follow these steps.
Locating the leak through observation and testing
Leak detection requires keen eyes and testing to search out the source of an air mattress leak. A combination of looking and evaluation can efficiently spot and tackle the area of worry.
Inflate the mattress fully and give it time for the air to spread. Check for deflation or flattening, which could hint at a leak.
Scrutinize the surface for any visible holes, punctures or tears. Inflate different parts and see which ones deflate faster than others. Apply soapy water on potential leaks, such as seams or valves. Bubbles mean escaping air, which pinpoints the leak’s position.
Mark the area with waterproof marker or tape and clean with mild soap and water to avoid adhesion issues. Keep sharp objects away, use a protective barrier between rough surfaces and mattress, and inspect for signs of damage on a regular basis.
Finding the leak’s location is like a detective mission – get the job done!
Marking and cleaning the area around the leak
To ensure a successful patch job, follow these steps:
- Mark and clean the area around a popped air mattress leak. Wipe away dirt or debris with a clean cloth or towel.
- Utilize a permanent marker or tape to mark the leak’s location.
- Fully deflate the mattress in order to prevent any extra air from escaping.
- Smooth out any wrinkles or folds in the fabric near the leak.
- Double-check for any other leaks on the mattress.
- Avoid getting any adhesive or cleaning products on sections surrounding the leak, as it could cause unnecessary damage or weaken them.
With these steps, your patched air mattress will provide ample support!
Patching Techniques
Photo Credits: Www.Mattressreviewguru.Com by Willie Garcia
Discover effective patching techniques to fix a popped air mattress. Learn how to utilize a patch kit for seamless repair or explore alternative methods for patching. With these expert techniques at your disposal, you’ll be able to extend the lifespan of your air mattress and enjoy a good night’s sleep once again.
Using a patch kit
Using a patch kit is a handy way to fix a popped air mattress. It’s essential to carefully follow the instructions and leave enough time for the glue to stick, ensuring the repair is successful and the mattress works again. Here’s a step-by-step guide to repairing air mattresses with a patch kit:
- Inflating & checking for deflation:
- Fully blow-up the mattress & spot areas leaking air.
- Look for deflation & parts not holding air.
- Locating the leak:
- Look for holes, punctures & tears.
- Gently press down on the mattress & look for hidden leaks.
- Put soapy water on suspected areas & watch for bubbles.
- Marking & cleaning the area around the leak:
- Mark the leak with pen or chalk.
- Clean the area with warm water & mild soap.
- Applying pressure on the patch:
- Follow patch kit instructions to apply glue on both sides of the patch.
- Place & firmly press the patch on the marked area, covering the leak completely. For tips on how to air out a memory foam mattress, visit this link.
- Allowing time for adhesive to set:
- Give the glue time to dry before using the mattress.
- Check manufacturer instructions for drying time, as it varies.
- Testing the repaired mattress:
- Inflate & check for deflation.
- Put soapy water on repaired areas & look for leaks.
By following these steps and using a patch kit, you can repair your air mattress and sleep comfortably again.
Step-by-step instructions for using a patch kit
To patch an air mattress, follow these steps using a patch kit for success:
- Inflate the mattress to maximum and close the valve.
- Look for bubbles, which indicate leaks.
- Deflate the mattress.
- Clean and dry the area around the leak.
- Roughen the surface with sandpaper from the kit.
- Apply adhesive on both sides of the puncture.
- Place one patch onto the adhesive-covered area and press it firmly.
- Smooth out bubbles and press down for several minutes.
By following these steps, you can repair your air mattress quickly.
Alternative methods for patching
Using other methods to patch an air mattress can be helpful in certain circumstances.
Super glue can be used to seal seams and stop deflation. Carefully apply the glue to the leak, and a strong bond will form. It’s suitable for smaller holes or seams that have come apart.
A shower curtain liner can be used as a DIY patch. It’s durable, making it good for larger holes or tears. Cut a piece of the liner to fit over the damaged area and secure it with adhesive or tape.
For small holes or tears, an old t-shirt can be used. Cut the fabric into a shape that covers the leak, and attach it to the mattress using fabric adhesive or stitching.
Duct tape can also work as a temporary fix. It won’t be a long-term solution, but it can seal a leak until a proper repair is done. Put tightly secured strips of duct tape over the leak for a rapid, temporary solution.
These alternate methods may help temporarily, but they won’t be permanent. It’s best to use patch kits for air mattresses when possible. They’re more reliable and long-lasting.
Small leaks in an air mattress can affect its ability to hold air, according to Reference Data. It’s important to address leaks right away, with alternative methods or dedicated patch kits.
Using super glue to seal a seam
- Clean the area around the seam.
- Dry it completely.
- Apply a small amount of super glue.
- Press and hold firmly.
- Allow it to dry.
- Test for leaks.
Remember: super glue may not be suitable for all materials and seams. Check with manufacturer guidelines or consult an expert. If done carefully, you can seal a seam with super glue and extend the life of your air mattress.
Using a shower curtain liner as a DIY patch
You can use a shower curtain liner as a DIY patch for your popped air mattress! Here’s how:
- Clean and dry the area around the leak.
- Cut out a piece of liner that is bigger than the leak.
- Put glue on one side of the patch.
- Place the patch over the leak, covering the entire area.
- Inflate the mattress. Identify where the leak is. Then, deflate the mattress.
- Clean & dry the area around the leak.
- Cut a piece of duct tape larger than the size of the leak. Apply it firmly over the leak.
- After cleaning and marking the area around the leak, make sure the patch is where it should be.
- Start with one side of the patch in the center and press firmly with your hand or a roller tool.
- Increase pressure as you move to the outer edge. Keep pressure even.
- Press each section of the patch lots of times to bond it securely.
- Finally, smooth out any air bubbles or wrinkles with your hand or a roller tool.
- Inflate the mattress.
- Find the leak with observation and testing.
- Put a mark and clean the area around it.
- Follow the patch kit instructions and apply the adhesive.
- Press firmly on the patch to make sure it sticks.
- Leave it for 24 hours before reinflating and testing the mattress.
- Inflate it to its maximum capacity, then watch for deflation.
- Examine the area where the repair was done. Check for any signs of air leakage.
- Apply a water and soap solution to the repaired area and observe for bubbles.
- Inspect other areas of the mattress for any signs of leaks.
- Repeat these steps if necessary.
- Wait 24 hours after patching before testing the mattress.
- Monitor the mattress during use to ensure there are no new leaks.
- Maintain the mattress well to prevent future leaks.
- Go for a top-notch mattress: Get one that’s known for resistance to leaks and from a reliable brand.
- Sharp objects? No way! Keep knives and scissors away from the mattress, and clear the area around it.
- Inflate properly: Don’t overinflate and follow the manufacturer’s instructions for the recommended level.
- Add a protective layer: Keep a cover on top of your mattress for extra protection against sharp objects.
- Keep it clean: Clean the surface regularly with a damp cloth. If needed, use mild detergent.
- Store it properly: When not in use, deflate the mattress fully. Then, fold or roll it neatly to avoid any damage.
- Protect from sharp objects: Avoid placing sharp objects near or on the mattress. Keys, pens, pets’ claws, and other potentially damaging items should be kept away.
- Inflate and check for deflation.
- Locate the leak.
- Mark and clean the area.
- Maintains mattress lifespan: Resolving air mattress leaks quickly safeguards a longer-lasting mattress. If unattended, small leaks can get worse over time, resulting in complex repairs or even making the mattress non-functional.
- Improves sleep quality: A leaky air mattress disturbs sleep quality by causing discomfort and uneven support. Timely fixing avoids this and lets you rest easy.
- Stops further damage: Acting fast on air mattress leaks prevents any potential damage from spreading. Left unchecked, leaks can expand and cause irreparable damage to the inflatable chambers or seams of the mattress.
- Saves on replacements: Repairing an air mattress is usually cheaper than buying a new one. Acting swiftly on leaks avoids unnecessary costs and makes your current mattress last longer.
- ✅ The best way to patch an air mattress is by using a rubber tire repair kit. (Source: Team Research)
- ✅ Other options for patching an air mattress include duct tape and vinyl tape. (Source: Team Research)
- ✅ To find a leak in an air mattress, you can listen for hissing sounds or use a mixture of dish soap and water to look for bubbles. (Source: Team Research)
- ✅ It is recommended to let the patch set overnight for longer-term durability. (Source: Team Research)
- ✅ The Maifede Bike Inner Tube Patch Kit is recommended for those who want to ensure their mattress stays fixed. (Source: Team Research)
- Confirm that there is a leak by inflating the mattress and checking if it deflates again.
- Locate the leak by listening for a quiet hissing sound or by dampening your hand and feeling for a cool burst of air. You can also use soap bubbles to find the leak.
- Mark and clean the area around the leak, using soap and water.
- Choose a repair technique based on the options available to you:
- If you have a patch kit, follow the instructions provided to fix the leak.
- If you don’t have a patch kit, you can use alternatives such as super glue, a shower curtain liner, a piece of an old t-shirt, or duct tape.
- Apply your chosen patch material to cover the leaky area, making sure it is securely attached.
- Allow the patch to set overnight, if possible, for optimal durability.
- Inflate the mattress again and check for any remaining leaks.
- Confirm the presence of the hole by listening for a quiet hissing sound or using a mixture of dish soap and water to locate any bubbles forming at the leak.
- Once the hole is found, clean the area around it using soap and water.
- Choose a patch material, such as a patch kit, or DIY alternatives like super glue, a shower curtain liner, a piece of an old t-shirt, or duct tape.
- Apply the patch material over the hole, ensuring it covers the entire area and securely adheres to the mattress.
- Allow the patch to set overnight for best results.
- Re-inflate the mattress and check for any additional leaks.
- Maifede Bike Inner Tube Patch Kit
- XFasten Fabric and Vinyl Repair Tape
This is a great temporary solution. But, you should consider more permanent repair options like patch kits or a professional.
Don’t let a popped air mattress keep you from restful sleep or camping trips. Take action now with a shower curtain liner DIY patch! Enjoy peaceful nights and memorable adventures – it’s an easy fix!
Using an old t-shirt as a patch
An old t-shirt is a simple and cheap way to fix air mattress leaks. Don’t use worn or dirty shirts. The fabric should be stain-free. Cut the fabric larger than the hole. Place it over the leak and press down. Give the adhesive time to set. This patch may not be permanent, but it’s easy and versatile. Use it as a temporary solution until a proper repair can be done.
Temporary fix with duct tape
Duct tape can be used as a quick-fix for a popped air mattress. Here’s a 4-step guide:
It’s important to know how to fix a popped air mattress. If you find a lump or weak spot, you can easily fix it by adding more layers of duct tape to reinforce and seal it.
Remember, duct tape is only a temporary fix! Seek a more permanent solution or consider getting a new mattress.
By following these steps, you can repair your air mattress with duct tape. You’ll sleep soundly!
Ensuring a Successful Repair
Photo Credits: Www.Mattressreviewguru.Com by William Moore
When it comes to fixing a popped air mattress, ensuring a successful repair is of utmost importance. In this section, we will explore the key elements that contribute to a successful repair. From applying the right pressure on the patch to allowing ample time for the adhesive to set, and testing the repaired mattress for leaks, we’ll provide you with the necessary insights to get your air mattress back in full working order.
Applying proper pressure on the patch
Pressuring the patch correctly is key to mending a busted air mattress properly. Get it wrong, and it won’t stick right. Too much pressure and the adhesive oozes out, compromising the patch’s performance. Here’s how to do it right:
Check if your patch kit has special instructions for pressure application; follow them for better results.
And don’t forget to give the adhesive time to set – no one wants a repair as short-lived as their New Year’s resolutions!
Allowing sufficient time for the adhesive to set
Pressure is important when pressing the patch. Don’t use or put any weight on the repaired spot til the adhesive is dry. If you don’t give enough time for adhesive to set, the repair won’t work. You need to wait for the adhesive to form a strong bond to the mattress material for a permanent fix. If you rush, you’ll end up with a temporary repair that won’t last.
Testing the repaired mattress for leaks
Testing a repaired air mattress for leaks is vital to guarantee the repair was successful. To test the mattress, follow these steps:
Remember a few key points:
Preventing air mattress leaks requires extra care, just like avoiding red wine at a white party!
Precautions and Maintenance
Photo Credits: Www.Mattressreviewguru.Com by Philip Lee
Taking precautions and properly maintaining your air mattress is key to ensuring its longevity. In this section, we will discuss essential tips for preventing leaks and offer insights on regular maintenance that will help extend the lifespan of your beloved air mattress. Stay tuned to discover effective strategies that will keep your air mattress in top-notch condition for all your future adventures.
Tips for preventing air mattress leaks
For a comfy sleep and a long-lasting air mattress, you must prevent leaks. Here’s how:
Inspect your mattress regularly for holes or weak spots, especially around the seams. Fix these small issues quickly to avoid major leaks. Follow these steps and you’ll sleep soundly, with a leak-free mattress!
Regular maintenance to prolong the lifespan of the mattress
Regular maintenance is key for an air mattress to last long. With regular maintenance, users can have their mattress last longer. Here are maintenance practices for this purpose:
For an air mattress to last, proper care must be taken. Maintaining it clean and following correct storage practices is important. Plus, protect it from punctures or tears due to sharp objects.
Regular maintenance must be done continuously. Incorporating these habits into your routine will help extend the lifespan of your air mattress.
Conclusion
Photo Credits: Www.Mattressreviewguru.Com by Donald Smith
In conclusion, it’s important to recap the steps to fix a popped air mattress and highlight the significance of promptly addressing air mattress leaks. Don’t let a simple issue disrupt your sleep or camping trips. Stay prepared and learn how to handle this common problem efficiently. Taking immediate action will ensure a comfortable and uninterrupted rest. Remember, a little maintenance today can save you from major inconveniences in the future.
Recap of the steps to fix a popped air mattress
Fixing a popped air mattress requires following the right steps. Start by inflating it and looking for deflation signs. Carefully examine and test to find the leak’s location. Once found, mark and clean the area around the leak for effective patching.
Recap of steps:
Different patching techniques can be used to seal the leak. A patch kit is a common option as it provides instructions for applying the patch. Super glue, shower curtain liner, old t-shirt, and duct tape are other materials that can be used as DIY patches.
Ensure a successful repair by applying pressure on the patch and allowing time for the adhesive to set. Then test the mattress for leaks to ensure all areas have been patched.
To prevent future air mattress leaks, take precautions and perform regular maintenance. Protect the mattress from sharp objects or weight, avoid over-inflation, and store it properly when not in use. This will prolong the mattress lifespan and reduce leak instances.
Importance of promptly addressing air mattress leaks
Tackling air mattress leaks quickly is key to maintain its top-notch state. Neglecting or delaying repair may cause further damage and bothersome circumstances. Acting fast on these leaks will save you from discomfort during sleep and unexpected deflation.
Benefits of timely handling:
Being prompt with air mattress leaks not only preserves its usefulness but also ensures a restful sleep. It is vital to address these issues immediately to avoid further damage and keep optimal performance. If you are wondering what is the best air mattress repair kit to use, make sure to check out our recommended options.
Some Facts About How to Fix a Popped Air Mattress:
FAQs about How To Fix A Popped Air Mattress
How can I fix a popped air mattress?
To fix a popped air mattress, follow these simple steps:
What should I do if there is a pin-sized hole in my air mattress?
If you have a pin-sized hole in your air mattress, you can follow these steps to fix it:
Is duct tape a reliable option for fixing an air mattress?
Duct tape can be used as a temporary fix for an air mattress, but it is not the most reliable option for long-term repairs. The glue on the tape may wear out over time, leading to the patch becoming loose or ineffective. It is recommended to use more permanent solutions, such as patch kits or DIY alternatives, for a durable and lasting fix.
What are some easy-to-use patch kits for air mattresses?
There are several patch kits available for air mattresses that are easy to use and provide effective repairs. Some recommended options include:
These kits come with clear instructions and the necessary materials to patch your air mattress easily and efficiently.
Can I repair an air mattress myself without professional help?
Yes, you can repair an air mattress yourself without professional help. With the right tools and materials, such as patch kits or DIY alternatives, you can easily fix common leaks in your air mattress. However, it is important to follow the proper instructions and techniques to ensure a successful repair.
How often should I check my air mattress for leaks?
It is recommended to regularly check your air mattress for leaks, especially before use or after long periods of storage. Air mattresses can naturally lose pressure over time, so regular checks will help identify any leaks or issues before they become bigger problems. Additionally, if you notice a sinking feeling or a significant loss of pressure during use, it is advisable to check for leaks immediately.


