Key Takeaway:
- Fixing an air mattress is important to ensure a comfortable sleeping surface and extend the lifespan of the mattress.
- To fix an air mattress, start by fully inflating it to make it easier to identify any leaks.
- Locate the leak by using water or soapy water and then mark it for patching.
- Patch the leak using a patch kit specifically designed for air mattresses.
- If a patch kit is not available, there are temporary DIY options such as using tape or glue to cover the leak temporarily.
- Regularly inspect and maintain your air mattress to prevent leaks and ensure its longevity.
Photo Credits: Www.Mattressreviewguru.Com by Anthony Nelson
Fixing an air mattress is crucial for a good night’s sleep and avoiding discomfort. In this section, we will discuss the importance of addressing any issues with your air mattress promptly. Learn about the potential consequences of ignoring the problem and how a simple fix can improve your sleep quality.
Importance of fixing an air mattress
An air mattress is an ideal option for quick bedding. But, if there are leaks, they need to be fixed fast! Not tending to the leaks can result in a bad sleep and even damage the mattress.
If the air mattress isn’t properly inflated, it can’t offer a comfortable sleep. This could lead to restless nights and bad sleep patterns. Plus, when using it without proper inflation, it could cause more leaks or damage.
\nIn order to fix your air mattress and ensure optimal comfort, it is important to know how to air out a memory foam mattress. This knowledge will help you address any issues with inflation and prevent further leaks or damage.
It’s important to identify where the leak is, so that the right patch or repair material is used. Examining it carefully will show exactly where the air is escaping. This means the patch is targeting the accurate spot, giving it the best chance of being effective.
A reliable repair kit is needed to patch the leak. These kits contain adhesive patches that stick onto the mattress and mend any holes or punctures. This way, the mattress is kept in top condition.
If one doesn’t have access to a patch kit, there are alternatives. Like duct tape or super glue, which can act as a stopgap until a patch kit for air mattress is available. These might not be as long-lasting, but they can help in the meantime.
Repairing an air mattress quickly is vital. By doing so, and using the correct methods and materials, the mattress will last longer and offer comfort to those sleeping on it. The maintenance and repair of air mattresses should be a priority to prevent issues.
Step 1: Inflating the air mattress fully
Photo Credits: Www.Mattressreviewguru.Com by Jonathan Hill
Inflate your air mattress fully for a good night’s sleep! Here’s how:
- Find the valve. Usually at the side or bottom of the mattress.
- Uncover the valve. Reveals the opening for inflation.
- Connect the Slumberjack air mattress pump or inflator. Securely, to prevent air leakage.
- Start inflating. Turn on the pump or inflator. Monitor the progress and stop when it reaches desired firmness.
Each mattress needs a different amount of time to inflate. Follow manufacturer’s instructions. After the mattress is fully inflated, close the air valve tightly. Don’t let air escape.
Inflating an air mattress properly is key to comfort, and Jason learned this the hard way! He went camping with friends for the first time. He thought he followed all the steps correctly but the mattress still felt uncomfortable. After consulting the instructions again, he realized he hadn’t fully inflated it. He quickly fixed it, and the rest of the trip was a success. He enjoyed a comfy night’s sleep on his fully inflated air mattress.
Step 2: Locating the leak

Photo Credits: Www.Mattressreviewguru.Com by Eugene Scott
Step 2: Locate the leak! An essential step for fixing your air mattress. Identify where air is escaping for successful repairs. Follow these simple steps:
- Inflate the mattress. Must do to detect the leak accurately.
- Check the valve. Make sure it’s tight and not damaged. Could cause air to escape, making it seem like a leak elsewhere.
- Apply soapy water. Make a mix of water and dish soap. Gently apply to the mattress surface. Focus on areas prone to leaks, like seams and valves.
- Observe for bubbles. Look closely as you apply the soapy water. If there is a leak, you’ll see small bubbles. Make a note of these spots for repair.
- Dry and mark the leak. Once you find it, dry the area thoroughly. Mark it with a marker or tape so you can easily find it again.
Be meticulous in observation and marking to guarantee a successful repair. Need help locating the leak? Inflate the mattress and submerge it in a bathtub or container of water. Air escaping will create bubbles, making it easier to find the leak. For more detailed instructions, check out How to Fix My Air Mattress.
Step 3: Patching the leak with a patch kit
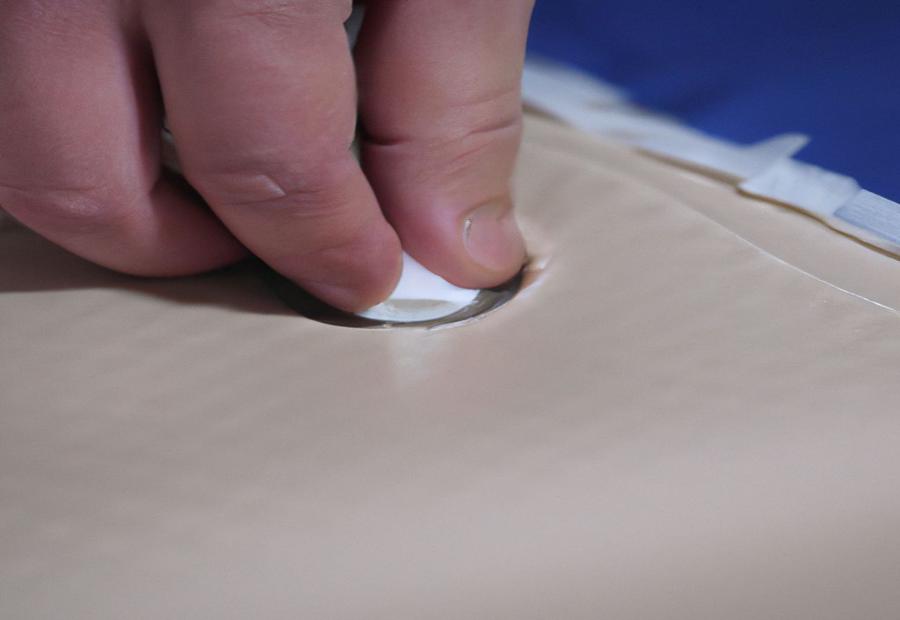
Photo Credits: Www.Mattressreviewguru.Com by Joe Thomas
-
Prepare the surface: Deflate the air mattress and clean the area around the leak. Make sure it’s dry.
-
Cut a patch: Take the patch material included in the repair kit. Cut it slightly bigger than the size of the leak. Round the corners.
-
Apply adhesive: Put a thin layer of adhesive on the patch and the area around the leak. Wait until it’s tacky.
-
Apply the patch: Place the patch over the leak. Press firmly for a few minutes to make sure it sticks.
Allow at least 24 hours for the adhesive to dry. Make sure to use a patch kit designed for air mattresses for a strong, durable repair.
Step 4: DIY temporary patch options
Photo Credits: Www.Mattressreviewguru.Com by Andrew Torres
Want a temporary fix for your air mattress? DIY! There are a few patch options available. Use a patch kit made for air mattresses or duct tape. Here’s how:
- Find the puncture/leak.
- Clean surrounding area with a mild soap & water solution.
- For patch kit, apply adhesive to patch & press firmly onto damaged area.
- For duct tape, cut a piece larger than the puncture & press firmly onto damaged area.
These patches are only temporary. You may need further repair or replacement in the future. But they can help you get a good night’s sleep while you figure out longer-term options.
Conclusion

Photo Credits: Www.Mattressreviewguru.Com by Alan Lopez
- Find the leak.
- Check the mattress for any tears or holes.
- Get a repair kit for air mattresses.
- Follow instructions when applying the patch.
- Make sure the seal is airtight.
- Fully inflate the mattress.
- Test mattress before use.
These steps can help fix an air mattress.
Some Facts About How to Fix My Air Mattress:
- ✅ Fully inflating the air mattress makes it easier to detect leaks. (Source: Team Research)
- ✅ Soapy water can be used to locate leaks in an air mattress by looking for bubbles. (Source: Team Research)
- ✅ Patch kits provide a reliable and long-lasting solution for fixing leaks in air mattresses. (Source: Team Research)
- ✅ DIY temporary options like duct tape and super glue can be used for quick fixes on air mattresses. (Source: Team Research)
- ✅ It is important to clean and dry the area around the leak before applying a patch or adhesive. (Source: Team Research)
FAQs about How To Fix My Air Mattress
How do I locate a leak in my air mattress?
One way to locate a leak in your air mattress is by fully inflating it and checking for any escaping air. You can also listen for hissing sounds or run your hand over the surface to feel for air escaping. Another method is to use soapy water and spray it on the mattress, looking for bubbles. Mark the hole with a marker for easier identification.
What can I use to patch a leak in my air mattress?
If you have a patch kit, you can use the adhesive backing or rubber cement provided. However, if a patch kit is not available, you can use alternatives like a shower curtain liner, old T-shirt, or duct tape. Apply these patches with super glue or rubber cement to create a tight seal over the leak.
How do I fix a leak in the seams of my air mattress?
To fix leaks in the seams of your air mattress, you can use super glue. Pinch or fold the seam and apply the super glue, holding it together for a minute or two to create a good seal. Another option is to use a small piece of vinyl patch, like those found in a bicycle inner tube repair kit, and adhere it with contact cement.
What should I do if my patch kit does not come with adhesive?
If your patch kit does not come with adhesive, you can purchase contact cement separately. Apply the contact cement to both the area around the leak and the patch itself. Allow the cement to dry for a few minutes before firmly pressing the patch onto the mattress. For extra security, you can also run a bead of cement around the perimeter of the patch.
Can I use duct tape to temporarily fix my air mattress?
Yes, duct tape can be used as a temporary fix for your air mattress. Cut a piece of duct tape to fit over the hole or leaky spot, place it on the mattress, and apply pressure with something heavy for a few minutes to help it adhere. However, keep in mind that duct tape is not a long-term solution and may not provide a completely airtight seal.
Are there any other temporary patch options for an air mattress?
Yes, you can use other temporary patch options for your air mattress. One option is to use a hot glue gun to fix a tear in the mattress’s seam. Another option is to use super glue for small holes. Additionally, you can use Flex Seal Tape to create a tight seal over the leak. These options can provide a temporary fix until you are able to obtain a patch kit or a more permanent solution.

