Key Takeaways:
- Identifying the leak in an air mattress can be done by listening for a hissing sound or feeling for escaping air, or by using soapy water to locate the leak.
- Preparing the area for patching involves cleaning the area around the leak and sanding the leak area for better adhesion.
- Choosing the right patching method is important, such as using a patch kit provided with the mattress, a bike tire patch kit, making a patch from thin plastic material, using hot glue for seam tears, or applying a temporary duct tape patch.
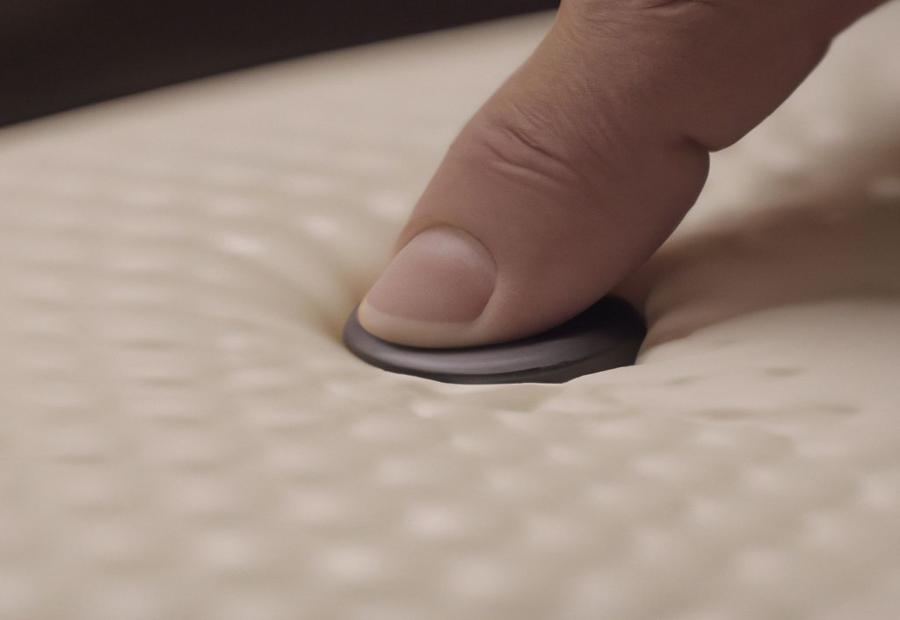
Photo Credits: Www.Mattressreviewguru.Com by Kenneth Martin
If you’ve ever faced the frustration of a deflating air mattress, you’re in the right place. In this section, we’ll dive into the ins and outs of this common problem and explore possible solutions. Get ready to uncover the reasons behind deflation and discover tips to patch your air mattress effectively. Say goodbye to sleepless nights and hello to uninterrupted relaxation with our handy guide. Let’s get started!
Brief explanation of the problem with deflating air mattresses
Air mattresses can be a source of frustration when they start deflating. This is due to leaks that let air escape, making them lose firmness. To fix this, you must find the leak’s location. Listen for a hissing sound or feel for air with your hands. Alternatively, you can use soapy water to find the spot – look for bubbles!
Once you’ve identified the leak, prepare the area for patching. Clean it and sand it for better bonding with adhesive materials. You can use a repair kit from the mattress, a bike tire patch kit, thin plastic material, hot glue for seam tears, or a temporary duct tape patch. Inflate the mattress, apply adhesive to each side of the patch, and firmly put it over the leak area to remove any air bubbles.
Allow for overnight set time, and then refill the mattress to check for any air leakage. For long-term durability, use a rubber tire repair kit, or look for advice from sleep product reviewers.
Identifying the leak
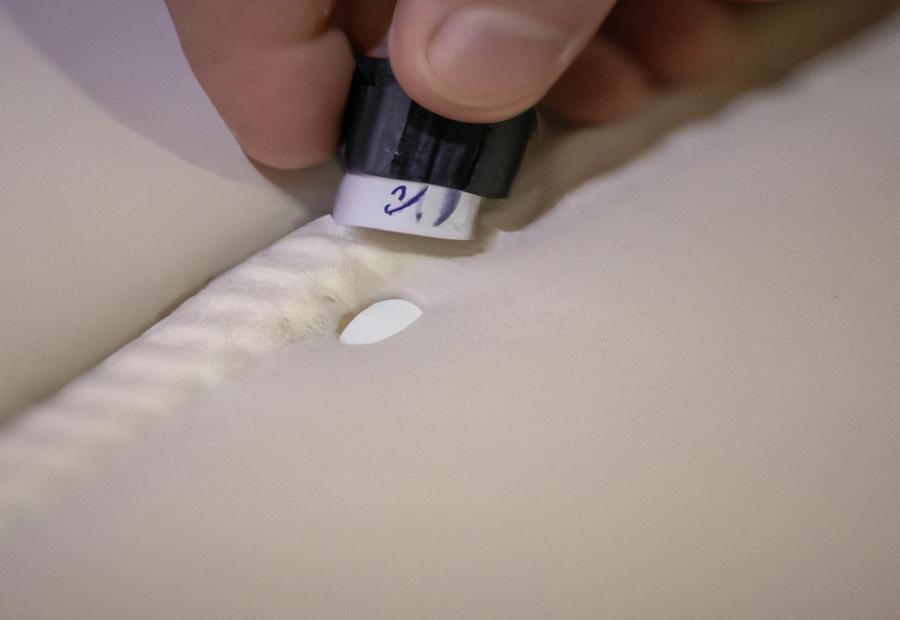
Photo Credits: Www.Mattressreviewguru.Com by Kevin Green
By knowing how to identify the leak in an air mattress, you can quickly resolve the issue and get a good night’s sleep. Whether it’s listening for a hissing sound or using soapy water to locate the elusive leak, these methods will help you pinpoint the problem area with ease. So, let’s dive into the techniques and tips that will save your air mattress from deflating.
Listening for a hissing sound or feeling for escaping air
Uncover air mattress leaks with four simple steps:
- Inflate it to its max.
- Listen closely for any whistling or hissing.
- Feel for escaping air with light pressure.
- Mark the leak’s location with tape.
Small leaks can be hard to detect. Soapy water bubbles can help.
Be proactive! Listen and feel to identify the leak before your next camping trip. Get a comfortable night’s sleep wherever your adventures take you.
Using soapy water to locate the leak
- To locate a leak in an air mattress, a common and effective method is to use soapy water!
- Create a soapy solution.
- Spray or dab it on the mattress, where a leak is suspected.
- As you slowly inflate the mattress, observe for any bubbles of air escaping.
- Note these locations and you’ve got the area ready for patching.
This approach offers a few advantages. It precisely localizes the leak without damage. It also saves time and effort. With this method, you can quickly identify the leak before patching. The result? A successful repair and a longer-lasting mattress! Get your cleaning supplies ready and let’s make that deflated disaster into a sleeping beauty!
Preparing the area for patching
Photo Credits: Www.Mattressreviewguru.Com by Daniel Mitchell
Preparing the area for patching is an essential step in fixing an air mattress. We’ll explore two key sub-sections that cover the necessary steps cleaning the area around the leak and sanding the leak area. These important preparations ensure a smooth and effective patching process for your air mattress.
Cleaning the area around the leak
For successful patching, cleanliness is vital when tackling air mattress leaks. Prior to attaching any patches, begin by cleaning the region near the leak.
Sanding the leak area
Sanding the leak area is a crucial step for a successful repair. It creates an ideal bonding surface for adhesive to stick to, and prevents future air leakage. Here is a 5-step guide to sanding:
- Begin by wiping down the area around the leak with a clean cloth or sponge.
- Identify and mark the exact location of the leak.
- Choose a fine-grit sandpaper, such as 220-grit, and cut a small piece.
- Gently sand the marked area in a circular motion, using light pressure.
- Carefully wipe away any dust or residue from the sanded patch area and its surroundings.
Remember – don’t oversand or apply too much pressure. Create a slightly roughened texture that enhances adhesive penetration while keeping the mattress material intact. Choosing the right patching method is essential for a successful repair!
Choosing the patching method
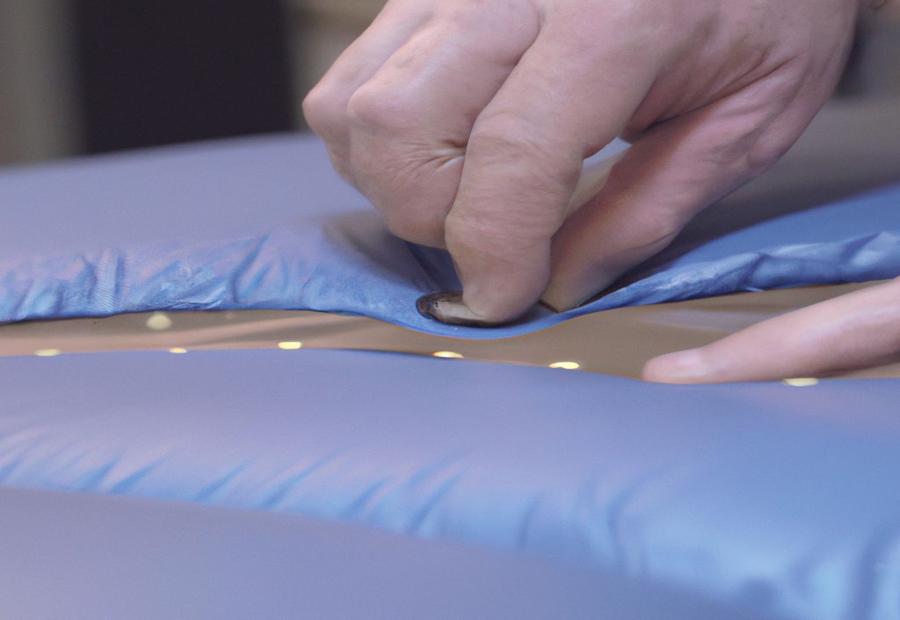
Photo Credits: Www.Mattressreviewguru.Com by Albert Anderson
When it comes to patching an air mattress, choosing the right method is crucial. In this section, we will explore different patching options, such as using a patch kit provided with the mattress, utilizing a bike tire patch kit, making a patch from thin plastic material, applying hot glue for seam tears, or using a temporary duct tape patch. So, let’s dive in and find the most suitable patching method for your air mattress.
Using a patch kit provided with the mattress
- Clean the leak area. Use a mild detergent or soap and water solution to gently wipe down the surface. Allow it to dry completely.
- Sand the area around the leak. Use sandpaper or an abrasive pad provided in the kit. This helps create a rough surface for better adhesion.
- Cut a patch from the repair material. Use scissors or a utility knife. Make sure it’s slightly larger than the leak.
- Apply adhesive to both sides of the patch. Follow the instructions provided. Don’t use too much adhesive.
- Position and firmly press down on top of the leak. Place the patch over the hole. Press down with even pressure for 30 seconds.
Additional Details:
Follow instructions from the mattress repair kit. A proper application will restore the functionality and extend the lifespan of the air mattress. Some kits may come with different fabrics or adhesive tape. Adjust the patching method based on the materials provided.
Using a bike tire patch kit
A bike tire patch kit is ideal for fixing air mattress leaks! This method uses materials and techniques usually used to repair bicycle tires, making it simple and available. With a few steps, you can use a bike tire patch kit to fix the leak.
Steps:
- Deflate the air mattress.
- Clean the area around the leak with soapy water and a cloth.
- Rinse and dry the area.
- Apply adhesive from the patch kit to the patch material. Or, cut a piece to size.
- Put the patch directly over the cleaned and dried area. Make sure it covers the entire leak.
- Press firmly on the patch. No air bubbles should be trapped.
- Let the adhesive set according to instructions. Then, re-inflate the mattress.
Using a bike tire patch kit is different than other methods mentioned in this article. The patches are designed for bike tires, making a secure bond between the adhesive and the air mattress. This ensures long-lasting durability and effectiveness in sealing leaks.
By using this method, you can easily fix any leaking issues with your air mattress. You won’t need to buy additional specialized materials or tools. It’s convenient and effective for restoring your air mattress.
Making a patch from thin plastic material
Patch-making using thin plastic can fix leaks in air mattresses. It’s flexible and durable, making it ideal. Follow these steps:
- Gather materials: thin plastic, scissors, adhesive.
- Cut the plastic into a shape that will cover the leak.
- Make sure the patch is big enough.
- Apply adhesive to one side and press it onto the leak.
- Smooth out any air bubbles and ensure a tight seal.
- Let the patch dry according to the adhesive’s instructions.
- Test the mattress to make sure the leak has been fixed.
Thin plastic patch-making is a cost-effective and efficient way to repair air mattresses.
Using hot glue for seam tears
Hot glue – don’t let it be a stranger! It’s a fabulous fix for torn seams on air mattresses. Simple and swift, you can seal up the tear and sleep easy. For extra protection, reinforce the repair with temporary duct tape. Get gluey and get sealing! Your mattress will thank you.
Applying a temporary duct tape patch
Ready to patch that leak and save your air mattress? A temporary duct tape patch is the way to go! Follow these steps:
- Cut a piece of duct tape big enough to cover the entire leak area.
- Stick it firmly over the leak, and smooth out any air bubbles.
This provides a quick, easy solution that’ll let you get back to sleeping on your inflatable sleep sanctuary right away. However, it’s important to keep in mind that this isn’t a long-term fix. Use it only as a temporary solution until you can make a more permanent repair.
Applying the patch
Photo Credits: Www.Mattressreviewguru.Com by Scott Hernandez
When it comes to patching an air mattress, the key lies in the application process. In this section, we’ll walk you through each step, from inflating the mattress and ensuring a clean surface to applying adhesive and positioning the patch over the leak. We’ll also highlight the importance of rubbing the patch firmly to eliminate any pesky air bubbles. So, grab your materials and let’s get your mattress back to its comfortable state!
Inflating the mattress and ensuring the area is clean
-
Time to fix that leak! Inflate the air mattress to max capacity with a pump or by blowing air in.
-
Listen or feel for any escaping air to locate the leak.
-
Clean the area around it with a mild detergent and water solution.
-
Scrub gently and rinse off soap residue.
-
Make sure to dry the area.
-
Check for anything sharp that could puncture the patch.
-
Use a soft cloth to remove dust and debris.
-
Vacuum cleaner with a small brush attachment can help in hard-to-reach areas.
-
Invest in a rubber tire repair kit for stronger patches and adhesives.
-
Get insights from sleep product reviewers for the best solutions.
-
Now apply the adhesive and position the patch like a pro.
-
Inflating and cleaning are the key steps to fix the leak!
Applying adhesive to the patch and positioning it over the leak
Ensure a secure repair on your air mattress leak by following these five steps:
- Inflate the mattress and make sure the area is clean and dry.
- Apply an adhesive to the patch – provided in a patch kit or a suitable alternative.
- Position the patch directly over the leak, covering all of the damage.
- Press firmly on the patch to ensure proper adhesion and remove any air bubbles.
- Allow time for the adhesive to set according to the instructions before testing for leakage.
It’s important to choose a suitable repair method. This can include a patch kit, thin plastic material, hot glue, or duct tape as a temporary fix. Be sure to follow the instructions given for your chosen method. Allow the adhesive to set overnight for maximum effectiveness. Then refill the mattress and check for air leakage.
Fix your air mattress leak for a comfortable sleep. Follow these steps to apply adhesive and position the patch properly.
Rubbing the patch firmly to remove air bubbles
To ensure a successful repair of your air mattress, follow these three simple steps:
- Inflate the mattress: Fill it up fully before rubbing the patch. This allows the patch to stick better and lets you find remaining leaks.
- Apply pressure: Place your hand or a flat object over the patch. Rub firmly back and forth. This spreads the adhesive and helps the patch adhere.
- Check coverage: After rubbing, look for air bubbles or unevenness. Repeat the process until the patch is smooth.
Removing air bubbles is crucial. They can make the patch come off or cause future leaks. By rubbing the patch firmly, you strengthen the repair and make your air mattress last longer.
Other tips:
- Use the right adhesive: Get one made for vinyl or PVC materials. It will bond better.
- Dry completely: After rubbing and applying adhesive, leave it overnight or as instructed by the vinyl repair kit manufacturer.
- Avoid weight or stress: To prevent damage, don’t put heavy objects or apply too much pressure on the air mattress patch.
By following these steps and rubbing out air bubbles, you can successfully repair your air mattress and get a good night’s sleep. If the patch holds up overnight, you did it!
Testing the effectiveness of the patch
Photo Credits: Www.Mattressreviewguru.Com by Jesse Lee
Testing the effectiveness of the patch involves key steps for ensuring a successful repair. Allowing the patch to set overnight and refilling the mattress are crucial aspects to address, but don’t forget to check for air leakage. These measures, backed by expert advice, guarantee a reliable and long-lasting solution for your air mattress.
Allowing the patch to set overnight
To repair an air mattress successfully, do the following:
- Inflate it and clean the area near the leak.
- Put adhesive on the patch and place it over the leak.
- Rub firmly to remove any air bubbles, making sure the patch connects well with the mattress.
- Let it sit undisturbed for 24 hours. No touching or moving the mattress!
- After 24 hours, fill the mattress with air and check if air is leaking from the patched area.
It’s essential to use good quality adhesive to repair the mattress. It usually comes in a patch kit included in the mattress or you can buy it separately. High-quality adhesive enhances bonding strength and makes the repair last longer.
Pro Tip: Press gently on areas surrounding the leak to check for weak spots or additional leaks that could need repair.
Refilling the mattress and checking for air leakage
- Inflate the mattress first. Use a pump or blow air in by mouth. This lets you check the firmness and condition, and detect any leaks.
- Listen for hissing and feel for air with your hands. Check seams and valves, as they can leak.
- If you find a leak, locate it. Apply soapy water around potential sites and look for bubbling or foaming.
- Patch it up. Clean the area with soap and water, to help the patch stick. Choose from bike tire patch kits, thin plastic, hot glue for seam tears, or temporary duct tape patches.
- Put adhesive on both sides and position the patch over the leak. Rub it firmly to get rid of air bubbles.
- Be prepared with a rubber tire repair kit. Re-inflate the mattress and regularly check for air leakage, to keep it in good condition.
Other recommendations for long-term durability
Photo Credits: Www.Mattressreviewguru.Com by George Perez
Looking for more ways to ensure the long-term durability of your air mattress? This section explores other recommendations that can help you maintain your mattress’s integrity. From utilizing a rubber tire repair kit to heeding the advice of sleep product reviewers, we’ve got you covered with practical tips to extend the lifespan of your air mattress.
Using a rubber tire repair kit
- Clean and clear the area around the leak.
- Then, use sandpaper or a rough cloth to roughen the patch area.
- Apply a small amount of adhesive from the rubber tire repair kit onto the patch and sanded area.
- Position the patch, firmly pressing it down, and leave to dry.
- Test the area after drying time by refilling the air mattress and checking for any signs of leakage.
Remember to use the rubber tire repair kit as instructed – its materials are designed for long-term durability. Follow these steps for a restful sleep – reviewers have vouched for it!
Following the advice of sleep product reviewers
Sleep product reviewers possess detailed knowledge about air mattresses. They test various products and can provide info about patching techniques and product recommendations. By following their advice, you can make repairs more effective and get a comfy sleep experience.
Explore multiple sources when researching your air mattress brand or model. Different reviewers may offer unique perspectives that can help retain its longevity. Take advantage of their expertise to make informed decisions and maximize its lifespan.
They suggest using a rubber tire repair kit for larger leaks or tears. This method is more durable and reliable. They could also recommend specific brands or types of patch kits that have worked well.
It’s important to clean and prepare the area around the leak before applying a patch. This step ensures better adhesion and increases chances of a successful repair. Don’t use temporary fixes like duct tape, as these are not suitable for long-term use and can cause further air leakage.
Reviewers may comment on the overall durability of different air mattress brands or models. This gives insights into which options are more likely to develop leaks and require frequent repairs.
Conclusion
Photo Credits: Www.Mattressreviewguru.Com by Daniel Scott
After understanding the importance of fixing air mattress leaks for a comfortable sleep and following the final tips and reminders for successful patching, you’ll be well-equipped to bid farewell to sleepless nights and enjoy restful sleep on your perfectly patched air mattress.
Importance of fixing air mattress leaks for comfortable sleep
Fixing air mattress leaks is essential for a comfortable sleep. If the leaks aren’t addressed, the mattress will gradually lose air and cause discomfort during sleep. It will also lead to an unstable sleep surface, making it difficult to maintain proper posture. So, it’s important to identify and repair any leaks.
The first step is listening for a hissing sound or feeling for escaping air. Inspect the mattress to find the leak source and its severity. Another method is using soapy water. Applying a mixture of water and soap to the surface will cause bubbles to form, making it easier to detect.
Before patching, clean the area with a mild detergent or rubbing alcohol. This ensures no dirt or debris interferes with the adhesive bonding process.
For patching, there are various methods. These include using a patch kit, a bike tire patch kit, thin plastic material, hot glue for seam tears, or a temporary duct tape patch. The choice of method depends on factors like materials availability and the severity of the leak.
After inflating the mattress and ensuring cleanliness, apply adhesive to both sides of the patch. Position it over the leak and rub it firmly in place to eliminate any air bubbles. Allow the patch to set overnight before refilling the mattress and checking for any signs of air leakage. A rubber tire repair kit or advice from sleep product reviewers may also contribute to long-term durability.
Fixing air mattress leaks is key for a comfortable sleep. Proper action must be taken immediately when leaks are detected. A study conducted by Sleepopolis showed that the average person moves 13-15 times during their sleep cycle.
Final tips and reminders for successful patching
If you’re fixing an air mattress, these tips will make sure the job is done right!
- Clean the area around the leak before patching. This creates a clean surface for the adhesive to stick and makes the bond stronger.
- Position the patch over the leak carefully. Line it up correctly and cover the area completely.
- Rub the patch firmly afterwards. This will remove any air bubbles and create a tight seal so no air escapes.
- Let the patch set overnight before re-inflating the mattress. This ensures that it has bonded with the material correctly and will last a long time.
Follow these tips to patch your mattress easily and prevent any future leaks. You’ll be able to sleep comfortably and without interruption!
Some Facts About How To Patch an Air Mattress:
- ✅ To locate a leak in an air mattress, you can listen for a quiet hissing sound or feel for a cool burst of air. (Source: Team Research)
- ✅ Dish soap mixed with water can be sprayed on an inflated air mattress to identify the location of a leak. (Source: Team Research)
- ✅ Before patching a hole in an air mattress, clean the area around it with all-purpose cleaner and a lint-free rag. (Source: Team Research)
- ✅ When applying a patch to an air mattress, it is important to press firmly and rub in a circular motion to remove any air bubbles. (Source: Team Research)
- ✅ It is recommended to place a weight of 10 pounds or more on top of the patch and let it sit for at least eight hours to ensure proper adherence. (Source: Team Research)
FAQs about How To Patch An Air Mattress
How can I find a leak in my air mattress?
To find a leak in your air mattress, you can try pressing on the inflated mattress and listening for a quiet hissing sound. You can also dampen your hand or arm and pass it over the mattress to feel for a cool burst of air. If those methods don’t work, you can mix dish soap with water in a spray bottle and spray it on the inflated mattress. The escaping air will cause soap bubbles to form where the hole is located.
What are the repair techniques for fixing an air mattress?
There are several repair techniques you can use to fix an air mattress. These include using a patch kit or any thin plastic material to patch the hole, applying duct tape or vinyl tape, using a rubber tire repair kit, or even making your own patch from shower or pool liner material. The choice of repair technique depends on your circumstances and the materials you have available.
How do I apply a patch to fix the hole in my air mattress?
To apply a patch to fix a hole in your air mattress, start by cleaning the area around the hole with all-purpose cleaner and a lint-free rag. If the mattress has a suede-like finish, you may need to sand the area with fine-grit sandpaper. Cut the patch slightly larger than the hole and apply adhesive generously to the center of the patch. Press the patch firmly onto the mattress, rubbing in a circular motion to remove any air bubbles.
What materials are required to patch an air mattress?
The materials required to patch an air mattress include a patch kit or any thin plastic material for the patch, adhesive, all-purpose cleaner, a lint-free rag, sandpaper (if necessary), and a weight of 10 pounds or more to place on top of the patch while it dries. It is also helpful to have a spray bottle, dish soap, and water for locating the leak, and talc or baby powder for a final moisture test.
Can I use duct tape to patch an air mattress?
Yes, duct tape can be used as a temporary fix to patch an air mattress. However, it is important to note that duct tape will eventually lose its adhesive properties, so it is recommended to clean off any residue before applying a more permanent patch. It is also advised to use a vinyl patch kit specifically designed for air mattresses, as it provides a more effective and long-lasting solution.
Where can I purchase a reliable patch kit for my air mattress?
A recommended patch kit for air mattresses is the Maifede Bike Inner Tube Patch Kit, which can be purchased on Amazon for $11. This patch kit is versatile, durable, and suitable for repairing inflatable beds. Additionally, various patch kits are available in stores or online that are specifically designed for air mattresses. It is best to choose a kit that is suitable for your individual needs.

